By Eric Peterschmidt
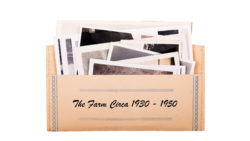
Have a bunch of old photos or slides that you want to share with others, but they aren’t in digital format? You’re in luck. You have more options today than ever before, and it doesn’t have to be hard or expensive to do.
Here are some tips, whether you do it yourself or hire someone to help you. There are quality, cost and effort trade-offs to each one. I hope you find an approach that fits you.
Have a laptop or desktop computer? If yes, then do it yourself!
Obtain a scanner if you don’t already have one. It involves a little bit of cost and some scanning time, but for many the results are well worth it.
 Create a folder on your computer for all of your scanned image files to be placed, or multiple folders if you want to organize further (recommended). If you have organized the hard copy photos already (for example, putting them into various named folders) I suggest replicating that organization with your computer’s digital folder names and structures so that you know where they came from. Haven’t organized your hard copies at all? No problem! Here are some tips to help you (https://www.tightknit.com/your-family-photos-how-to-transform-them-to-a-living-legacy/).
When scanning, you have a couple of important decisions to make:
- Format. When scanning, you have a choice of what format you want the digital files to be. Family photo archivists, myself included, will often scan and output as TIFF files. These are non-compressed, so no data is lost. They are better to work with when editing or post-scanning clean-up is required. They can later be converted to JPEG files, which have smaller file sizes and can be easier to move around. JPEG files, on the other hand, use “lossy” compression, which means that some data is lost when the file is compressed (made to a smaller file size). In addition, every time a JPEG file is opened and saved (for example, after editing or clean-up), a small amount of data is lost. However, JPEG files are ubiquitous, simpler to manage and may be fine for you – especially if you choose the highest quality JPEG setting.
- Resolution. Resolution is how much detail of an image you want to be able to see. For example, when zooming in – and there will be many times that you will want to zoom in to identify things like jewelry, street signs, license plates just for a couple examples. I recommend scanning at a resolution of at least 300 dpi (dots per inch) for documents, 600 dpi for prints and 3000 dpi for slides and negatives. If the prints are very small (2 x 3 or smaller), bump up the resolution to at least 1000.
Here are some options for using a scanner:
Option 1: Use your scanner and do your own scanning.
Quality: Expect good to excellent
Effort: Significant
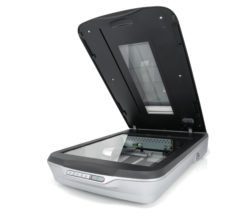
Buy a scanner that fits your needs. A decent scanner can be purchased for a couple hundred U.S. dollars, and you’ll have it to use anytime. Flatbed scanners are best for photo prints and documents.
If you have transparencies (slides or negatives), look for a flatbed scanner that can do film, as they have a back-lit lid to shine the light through the media.
A good feature to look for is a scanner that will allow you to place more than one photo at one time on the flatbed. The scanner software will then scan each photo individually, saving you time. A popular, moderate-priced option is the Epson Perfection V600.
Option 2: Use your scanner but hire a family member to do the scanning.
Quality: Expect good to excellent
Effort: Moderate
Have the computer and scanner (or willing to purchase it) but not the time? Here is an option many have chosen. Hire a niece, nephew, or teenage child who is looking for some work over the summer, spring break or on weekends. Ask them to do the grunt work for a fee! They can put in the time so you don’t have to. It is an opportunity for them to also be exposed to the family photos with you nearby to answer questions they may have about who is who.
Option 3: Don’t buy, but instead rent a scanner and do your own scanning.
Quality: Expect good to excellent
Effort: Low to moderate
If you don’t want to buy a scanner, this is an interesting alternative. Rent one. It’s like the “Netflix of scanning”. Renting a slide scanner is not cheap – likely more than the cost of buying a basic scanner. But they are often high speed with more automation – the combination which makes it go much faster, and for some, time is money. An option to consider is the company E-Z Photo Scan (https://services.ezphotoscan.com/rent-photo-scanner-photo-slide/) – full disclosure that I have never used them, but they have been in business many years and appear to be a great option). I recommend doing all of your photo or slide preparation ahead of time and then renting the scanner for several days (such as over a weekend) to get it all done in one shot.
Professional-grade scanners are so fast and efficient, you’ll be amazed how much you can accomplish! They claim that a user can “easily scan 3,000 slides or photos in a weekend”. You will need a computer to connect it to. You should be proficient with your desktop or laptop computer. If not, have a family member or friend who is, join you to at least help you get started. You should also confirm with the company what level of computer expertise they recommend.
Don’t have a laptop or desktop computer, but have a smart phone? Here is another “do it yourself” option!
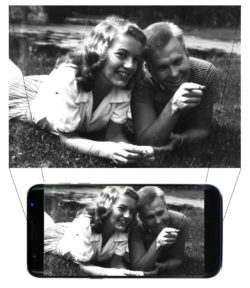 Note that this will not provide archival-level quality, either in resolution or in color replication. However, it may be all you need if your objective is to digitize some photos to share with family quickly or on a test basis.
Option 1: Use a smartphone/tablet scanning app.
Quality: Expect OK to good
Effort: Moderate to Significant
Photo scanner apps are available for use on a phone or tablet and can be a quick and easy option. The resolution is not as good as a flatbed or rented scanner but is getting better all of the time. Look for apps that auto-crop the edges so that the photo is always at right angles. Two apps to consider are Photomyne and TurboScan (check your mobile device app store).
Option 2: Use your smartphone camera to “take a photo of a photo”.
Quality: Expect OK to good
Effort: Moderate to Significant
While the image resolution is basically the same as using a smart phone scanning app (above), additional time may be required if you want to crop down to just the photo. That is, remove background that the camera picked up that is not part of the photo. The good photo scanning apps do that cropping for you.
Don’t have the time, but have some disposable income? Hire professionals!
If you are looking to save time and have available cash, this is a fantastic option. Hire it out to professionals. It will be more expensive but will save you time. The results are outstanding as they ensure exposures are correct when scanning. They can often do photo restoration (e.g. scratched or otherwise damaged images) for an additional fee.
Option 1: Use a local scanning service.
Quality: Expect excellent
Effort: Low
Most metro areas have photo scanning or photo conversion business available. That means, they actually do the work on-premises (don’t ship it out). Google “Photo Transfer Services” in your metro area to find them. I like local services best because by keeping them in-house, they are eliminating the risk of your photos being lost or damaged in shipment. These companies generally have their pricing online. Have lots of photos? You don’t have to do them all at once. Start with just your high priority ones (click here for suggestions on how to prioritize your photos for scanning). Simply bring in your box of photos or even videos and they can digitize them for you. If you have organized them prior to bringing them in, make sure the digitized images they provide back to you replicate your organizational structure. When done, you will get your original photos back as well as your digital files – typically on a USB thumb drive.
Option 2: Use a mail-in scanning service.
Quality: Expect excellent
Effort: Low
When a local service is not available, or if you have no issue with sending your photos away, there are several services to choose from. Consider using one that does not in turn send your images offshore to another company for digitization. You can find out by talking to them and asking about their process and if everything is done in one facility. Legacybox.com and iMemories.com are two companies to consider.
Regardless of which method you choose, the end result is you will have digital versions of family photos. What’s next?

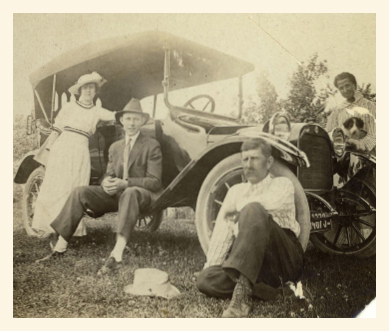
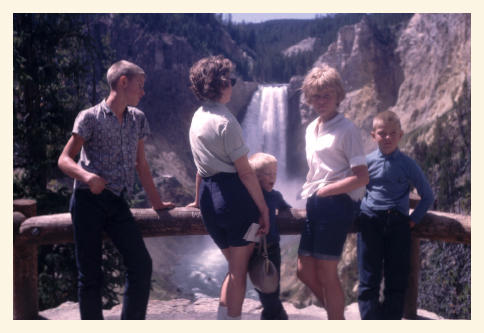
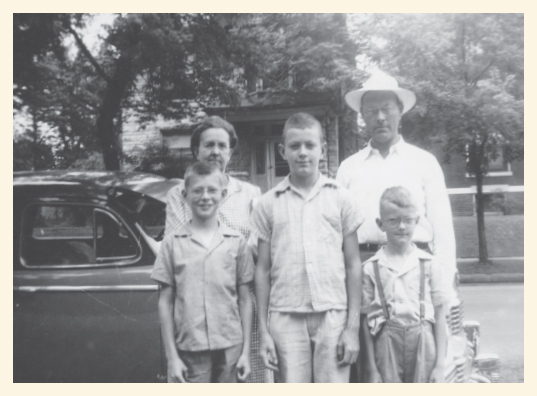
That is a very important question. You may feel you are done – many do. Perhaps you make copies of the files and send to your family members. That certainly is an option. But the truth is, you are now presented with a huge opportunity. The tough work is done. Now it is time to gather the family around (virtually too!) to share and enjoy what a family asset you have. In those photos are your people and there is nothing better than using the aggregate intelligence of your family to discover, uncover, capture and preserve what is there, because everybody knows something, but nobody knows everything. The risk of not doing so? While you may recognize people, places and things in these photos, will your children or grandchildren? If you don’t capture what you and your family know, these photos will be nothing more than interesting and anonymous photos that have no obvious connection or value to the family. Once that happens, it is only a matter of time before they are tossed and end up in a landfill.
So, how do you do that? How can you gather family around to collaborate in a way that the results are captured, shared and preserved – for generations? Watch for a future post for some guiding principles. In the meantime, happy scanning!